Document List
The document list, i.e. the hitlist, is located to the right of the navigation menu, in the central part of the screen, when the user clicks on one of the modules (1). The document list or hitlist (2) shows the documents on the individual module. The data is arranged in a column display of metadata, with the option of simultaneous filtering and searching by metadata in the top row. The hitlist display settings are configurable; by default they are set to the content required for your organization.
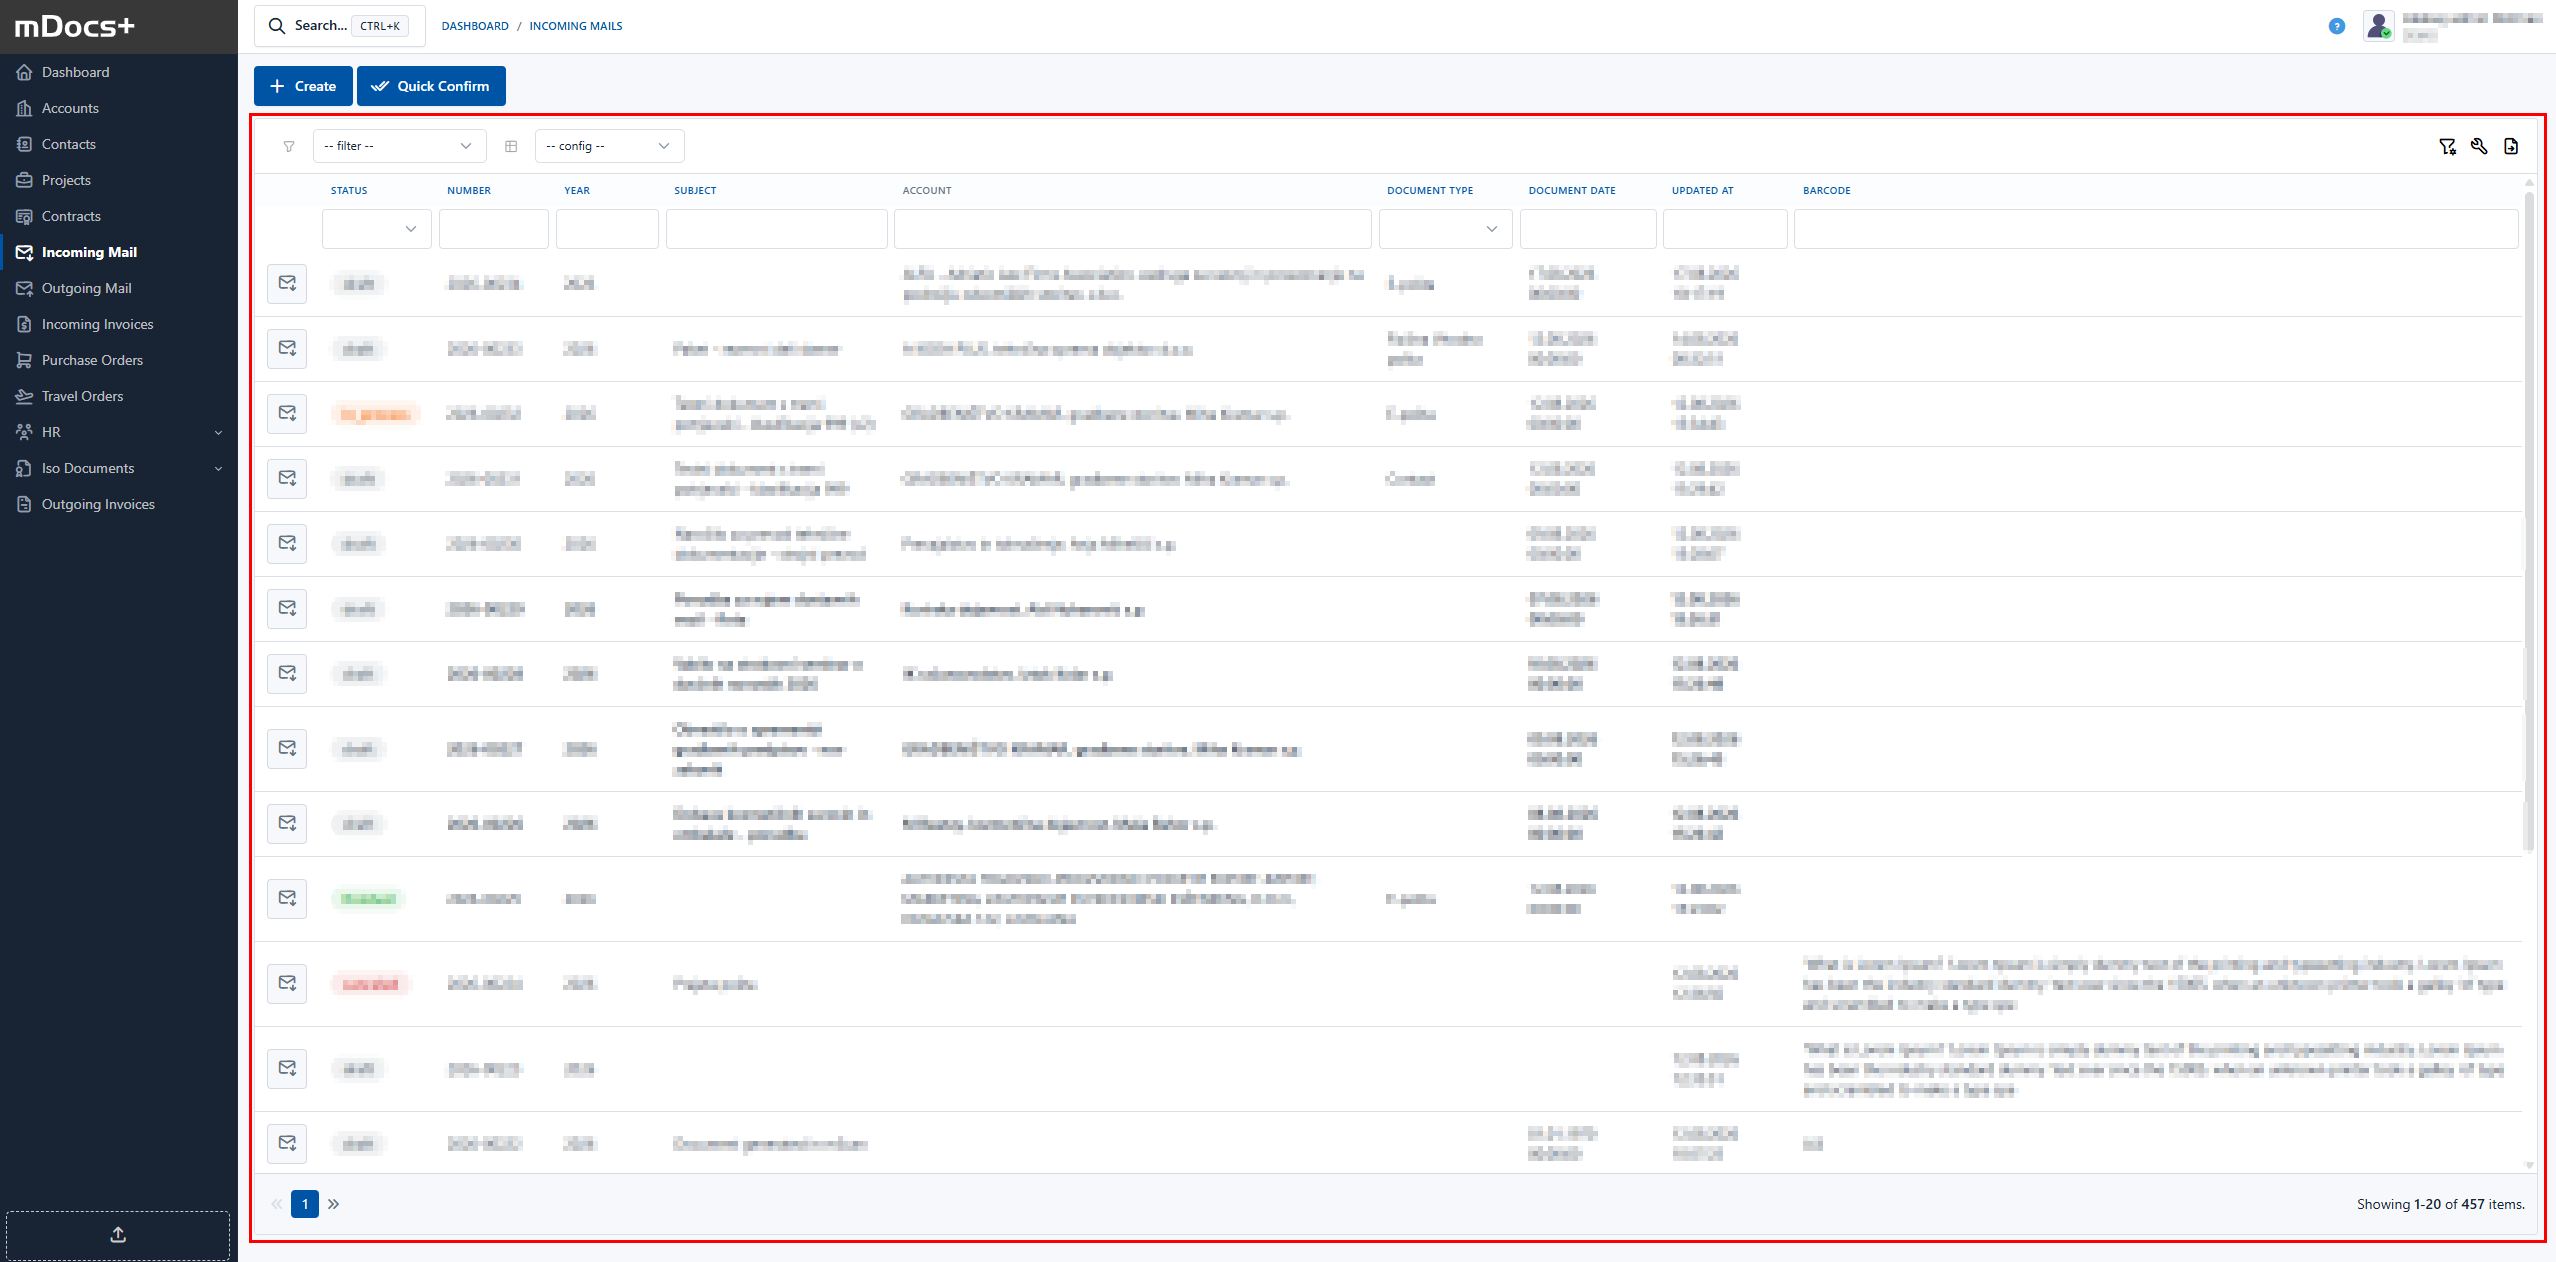
Where in the system, i.e. on which module, the user is currently located, can be seen from the navigation trail, i.e. the breadcrumbs (3). Through the navigation trail the user can change their position without using the navigation menu, and e.g. return to the dashboard (by clicking the dashboard in the navigation trail) or return directly to the hitlist after finishing reviewing a document.
Navigating the document list
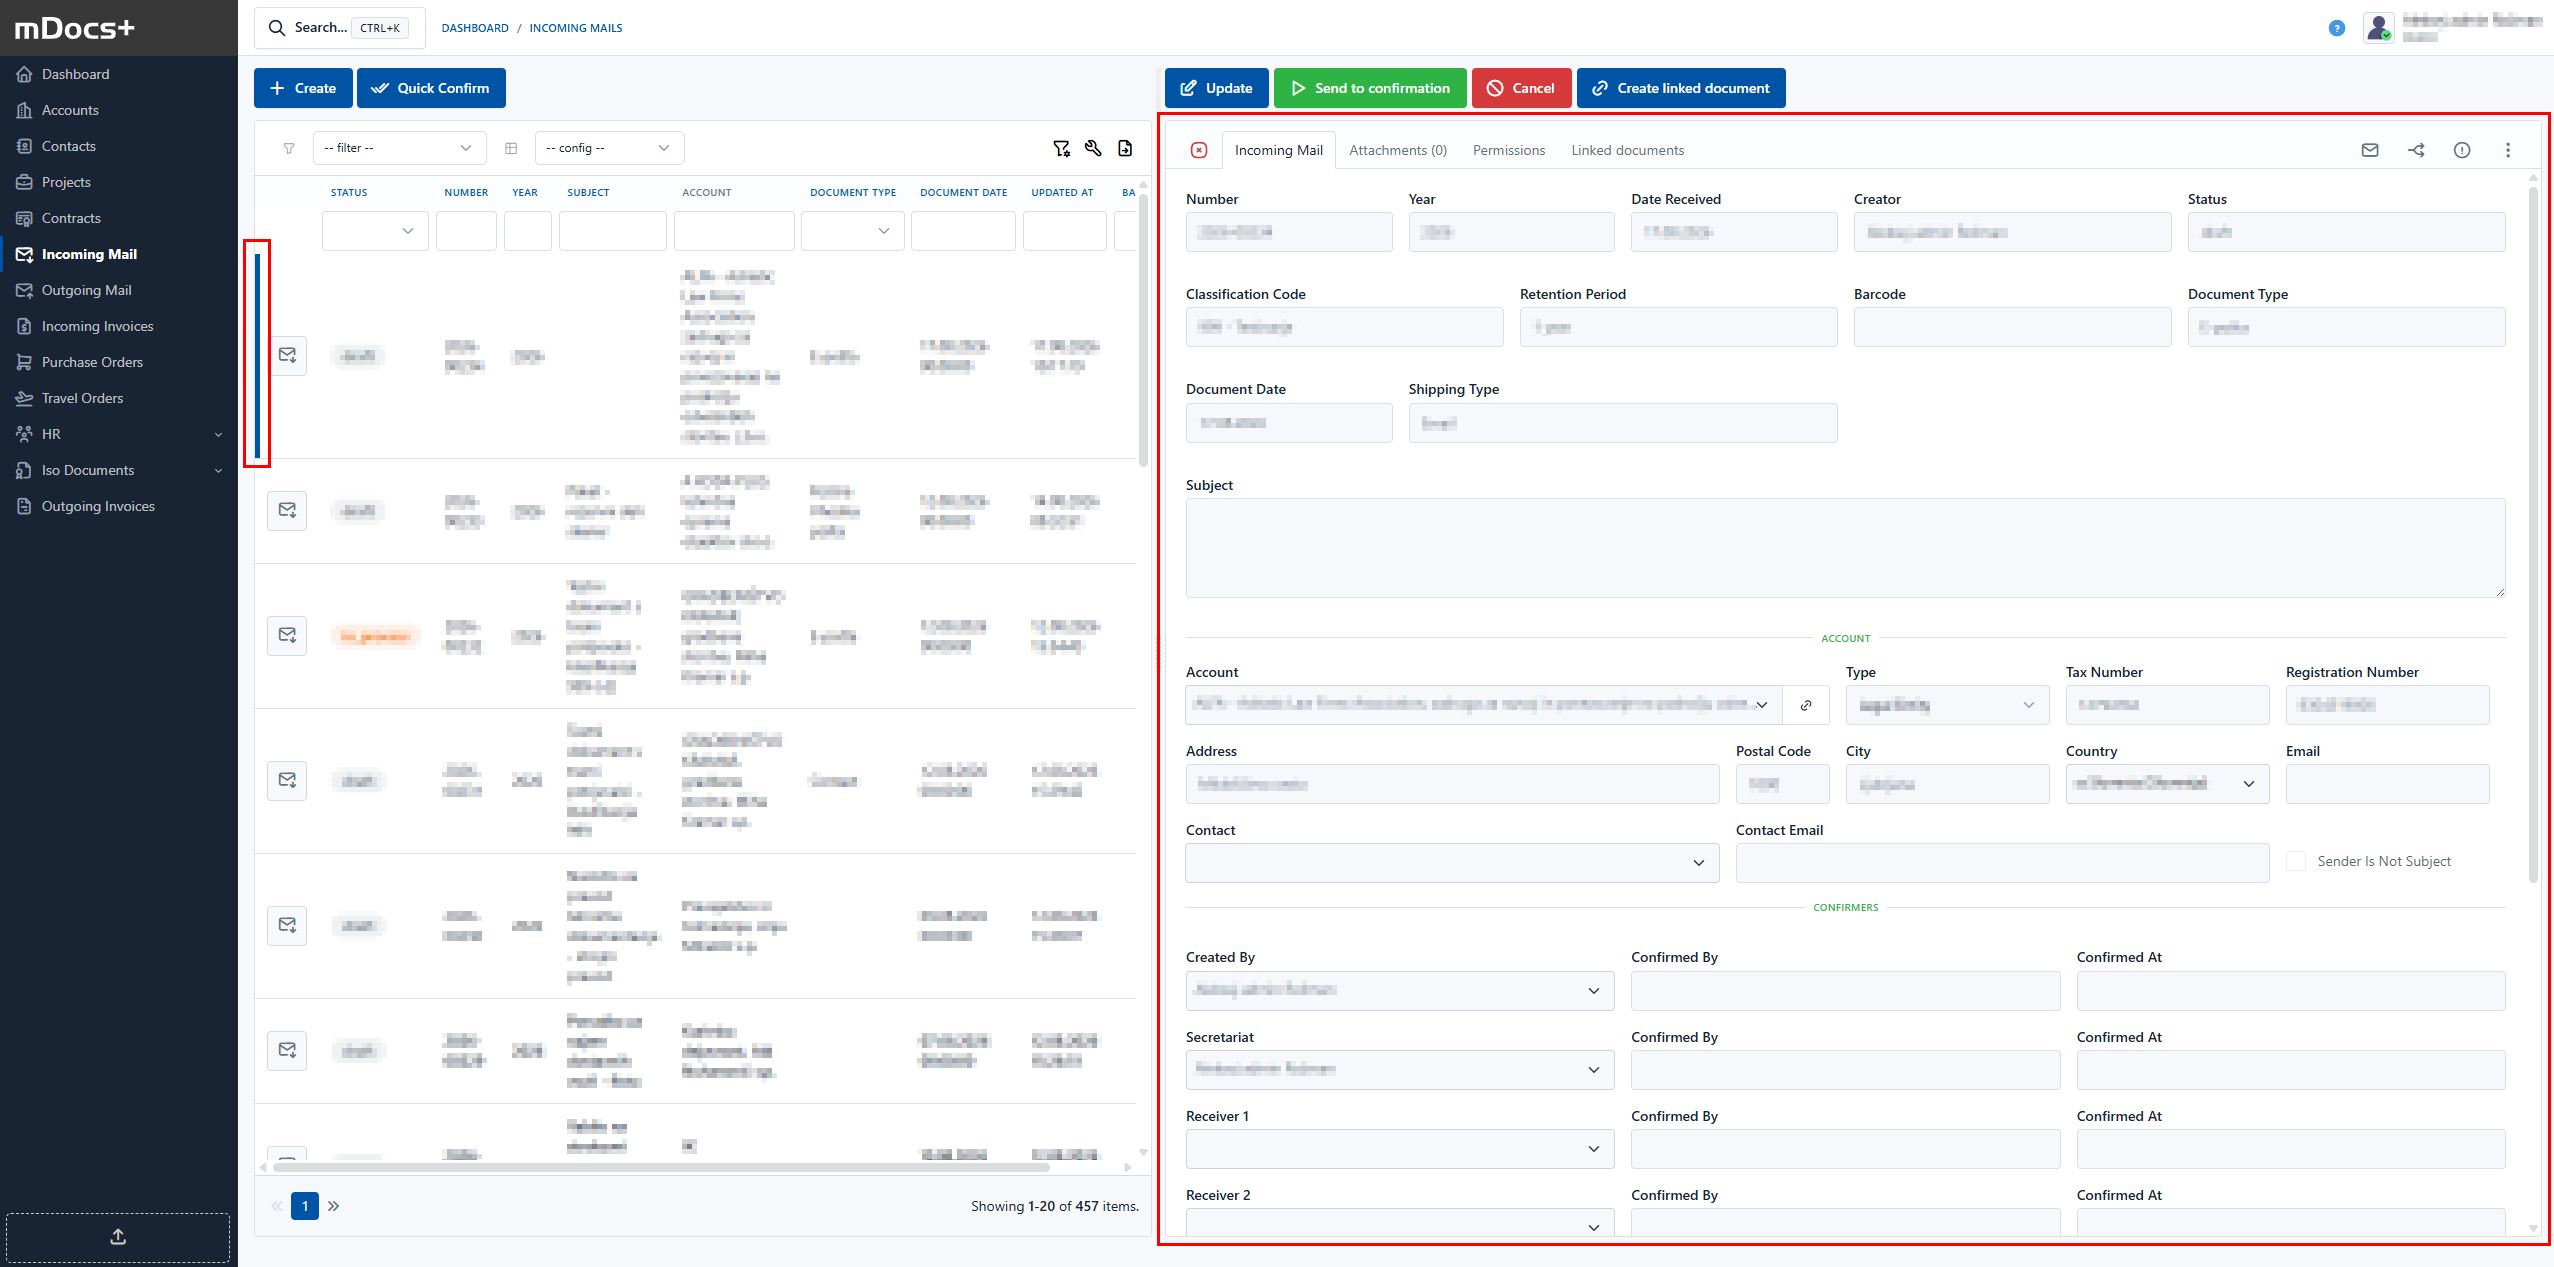
When you click on a document (1), a blue bar appears on the left side of the document on the hitlist, marking the document for which a window with document details opens on the right (2). The user closes the document preview by clicking the cross in the top left corner of the previewed document.
Searching the document list
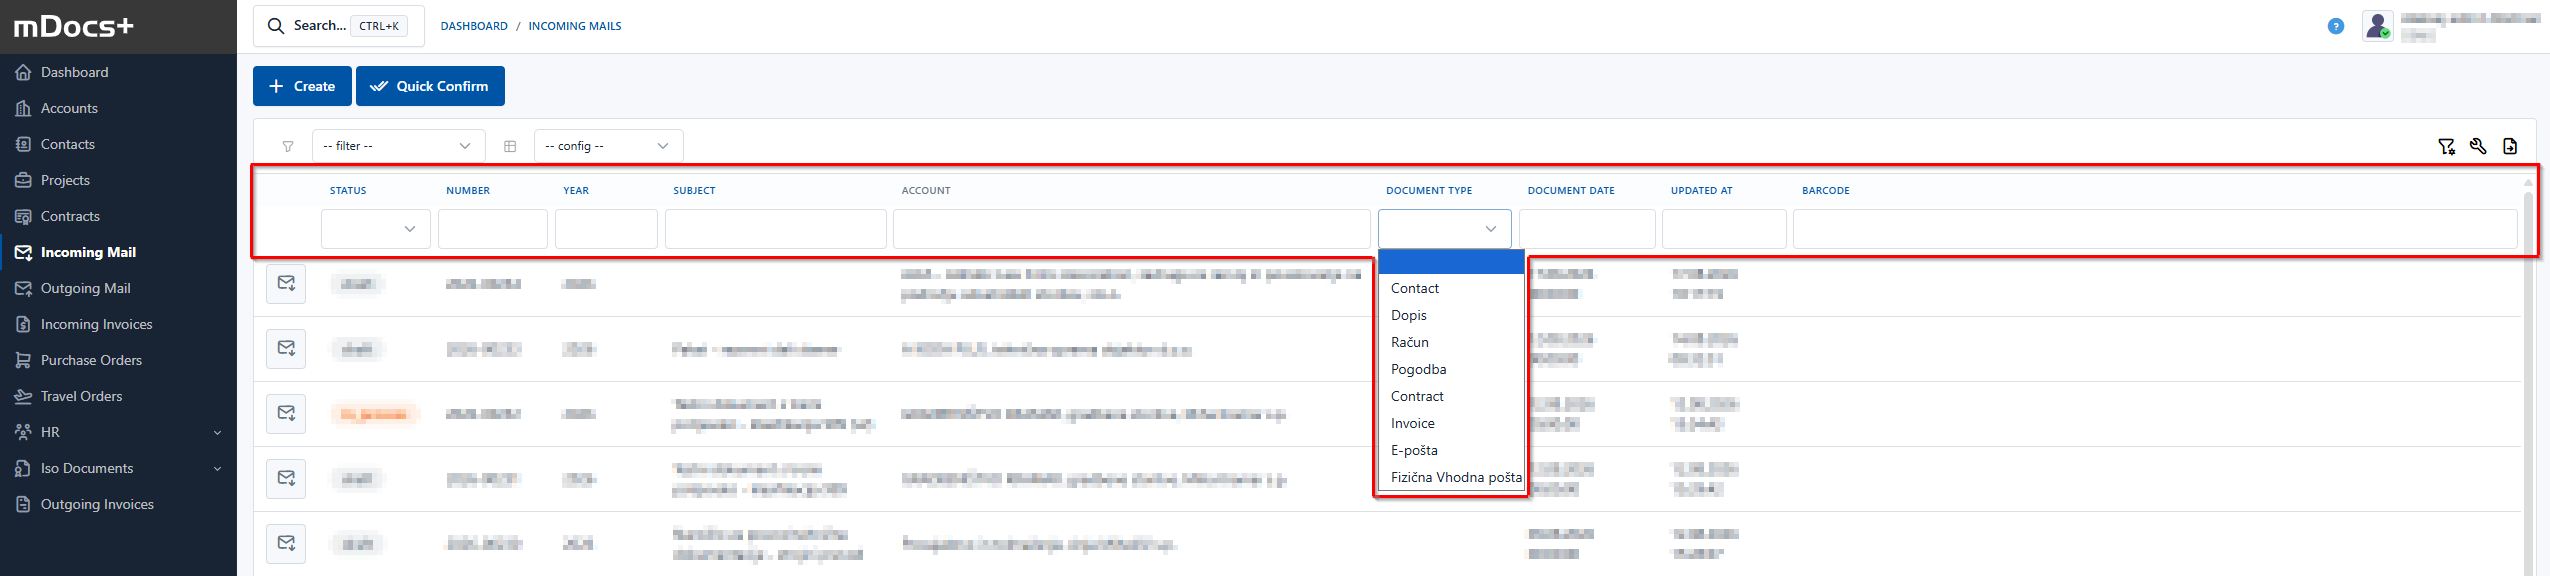
The user can perform a search on the document list or hitlist, where documents are shown according to the metadata captured on each individual record or document, by entering a string or selecting from a drop-down list, by one or more metadata fields, i.e. by columns, and sort the documents according to various parameters:
Using saved filters
The user can create and save filters for frequently used search criteria. This is done by selecting and sorting by a certain column, then clicking the filter button, entering a filter name and saving it. This allows quick switching between different filters without needing to re-enter the search criteria. For example, the user can save several search filter combinations, on several columns, for a frequently used search combination:
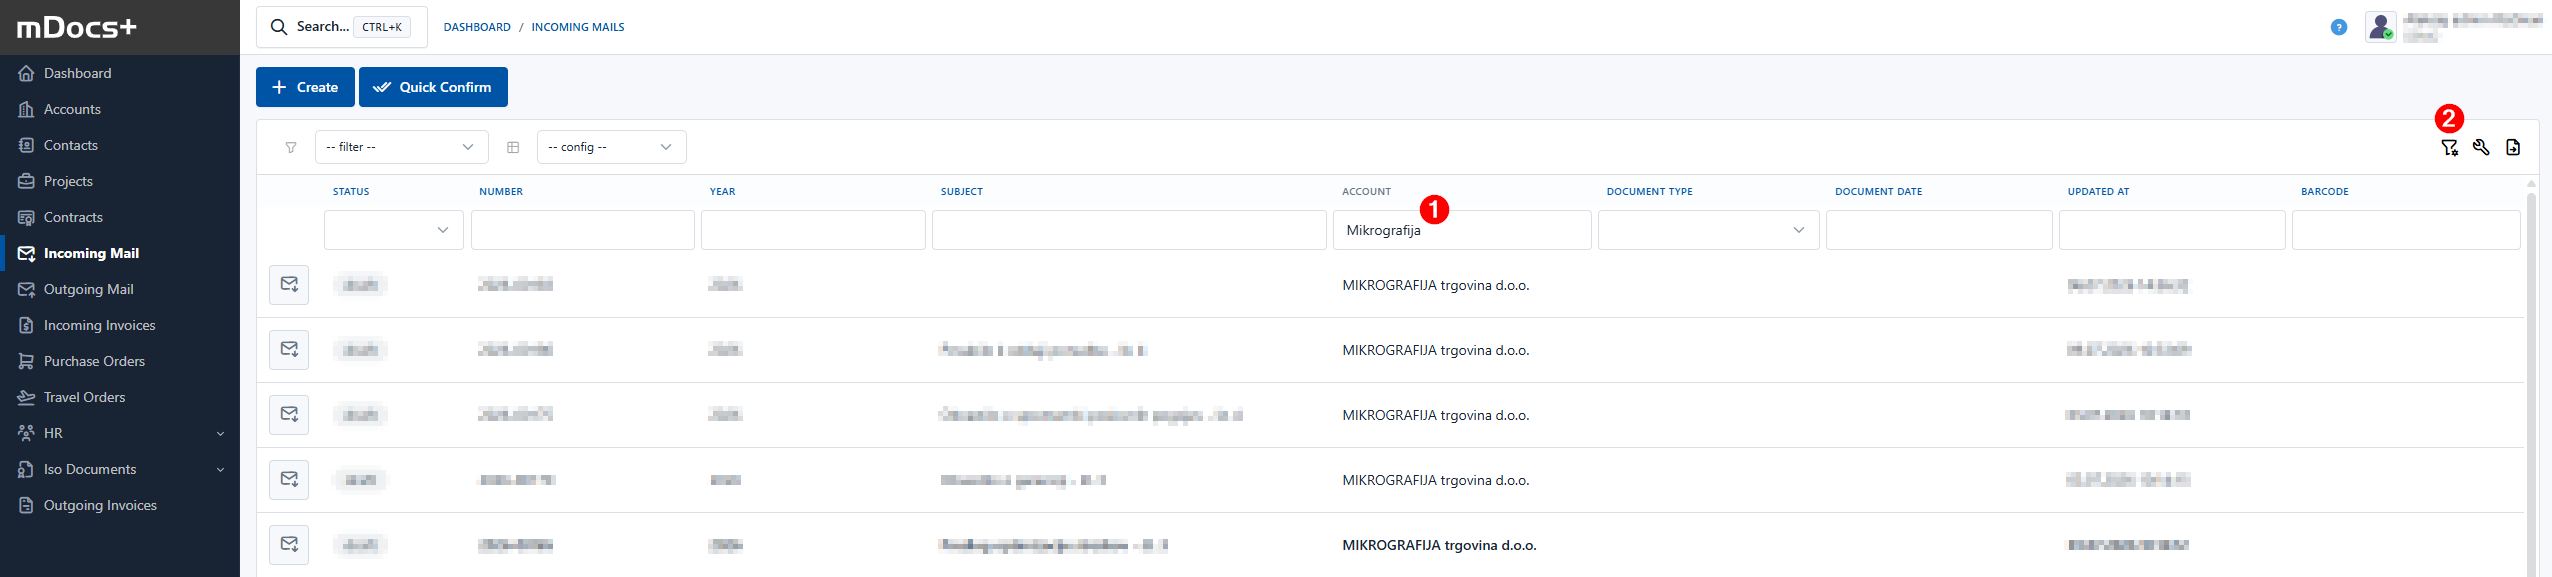
Clicking the Filter icon opens a window for entering data. Through this icon the user manages their personal search filters:
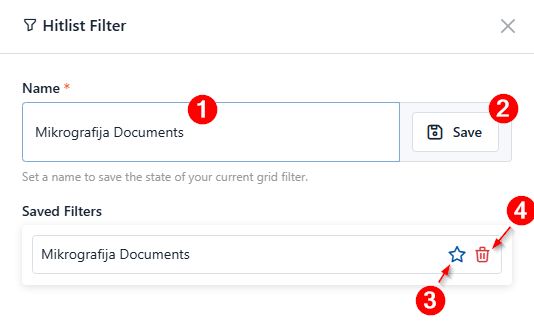
The user can quickly access and use active personal search filters by selecting the desired filter, in the top left corner above the hitlist:
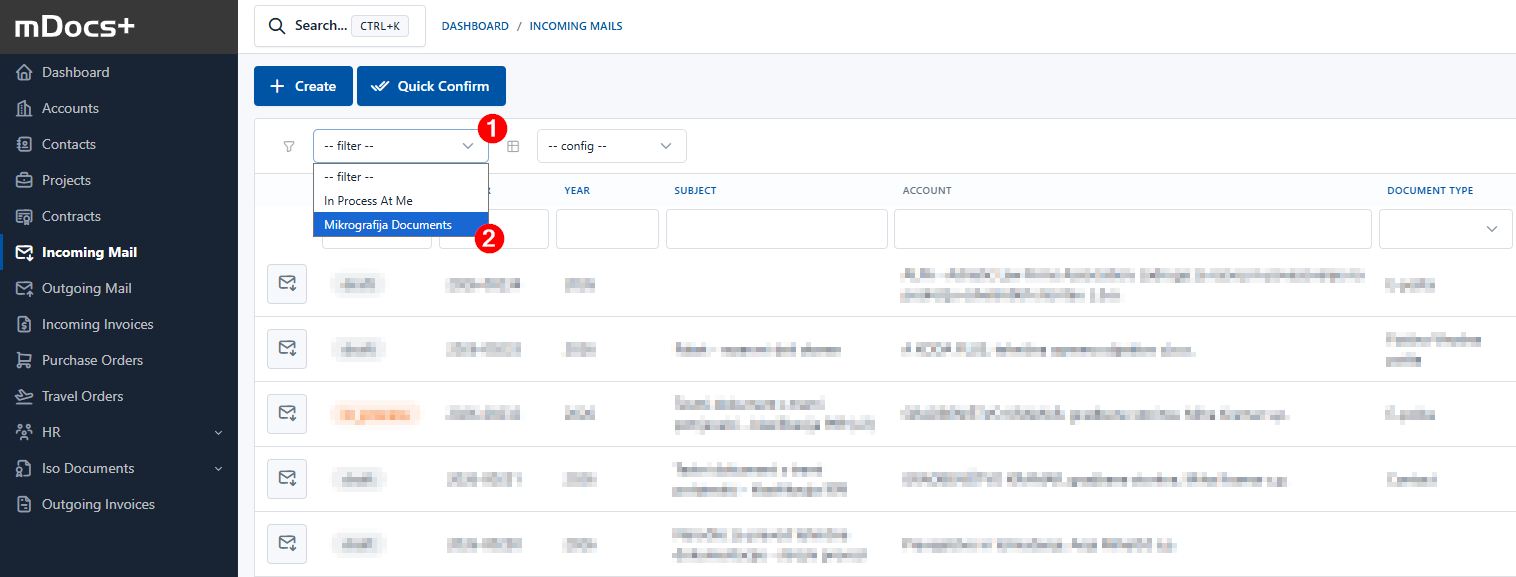
Customizing the document list
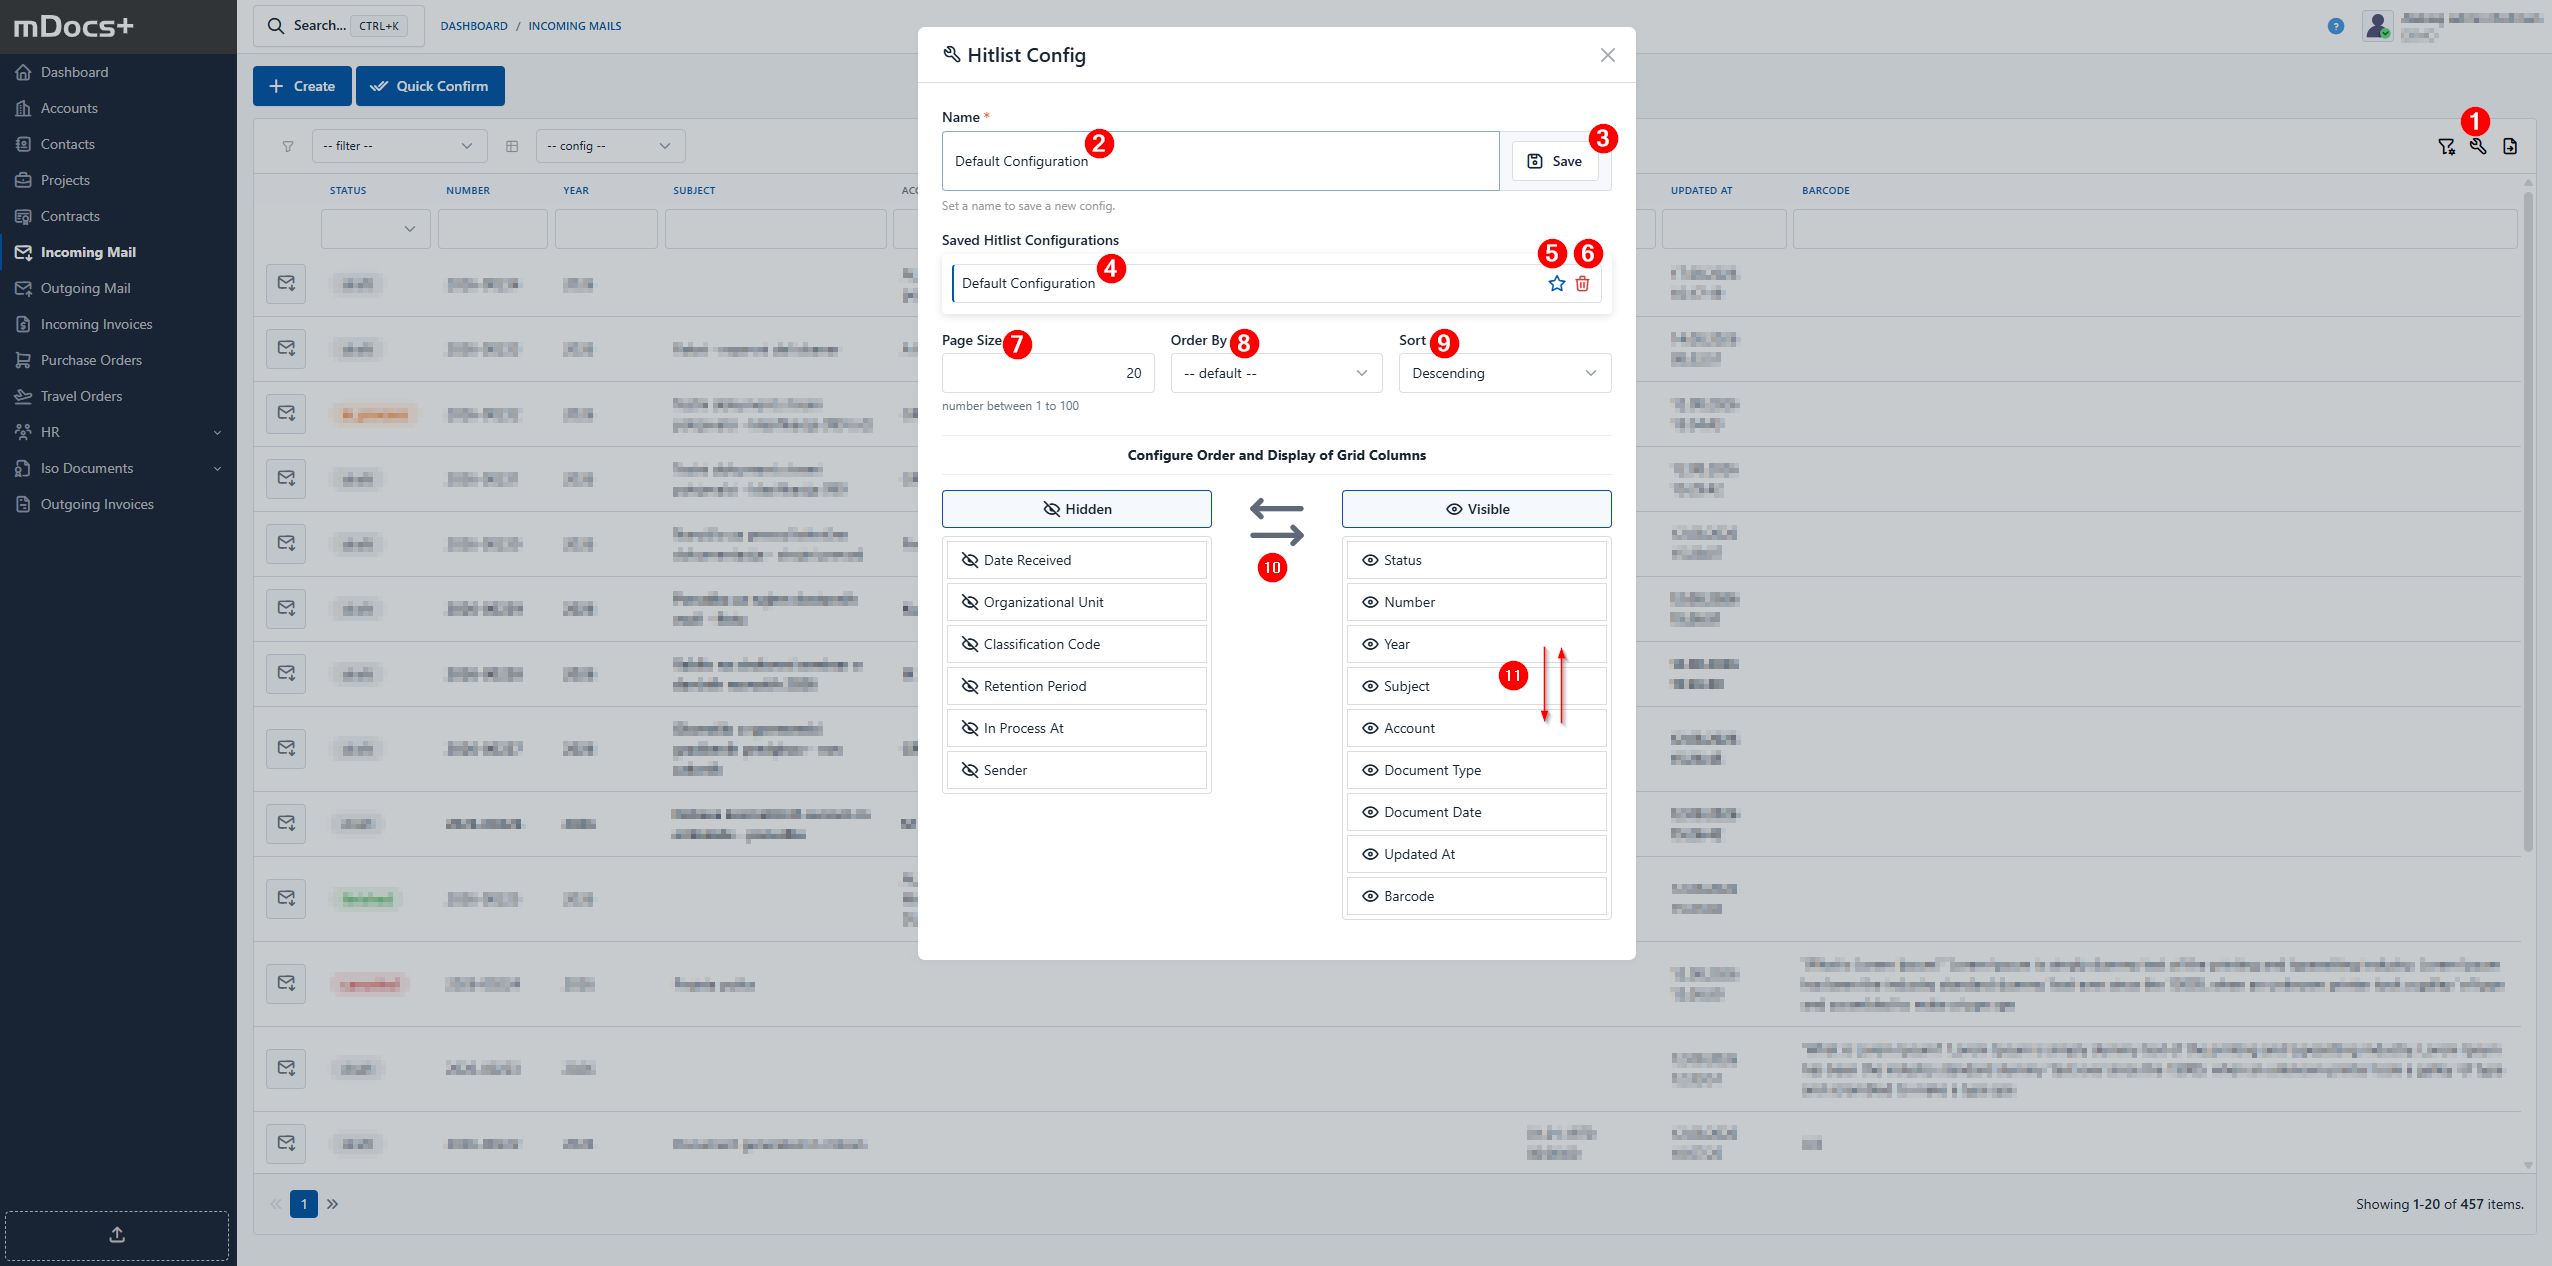
The document list or hitlist is by default set to the default required column sequence and metadata display. Using the Configuration icon (1), the user can set the display or personalize the hitlist in several ways.
Adding a new document list customization
Configuration procedure:
- Izberi ikono "Konfiguracija" (1).
- Odpre se modalno okno za konfiguracijo.
- V polje Naziv (2) vnesite naziv konfiguracije (denimo "Privzeta konfiguracija").
- Potrdite izbiro s pritiskom na gumb "Enter" na tipkovnici, ali kliknite gumb Shrani (3).
- V modalnem oknu se odprejo dodatna polja za vnos poleg polja Naziv:
- Polje število zapisov na stran (7) omogoča izbiro števila prikazanih zapisov na eni strani (število med 1 in 100).
- Polje "Razvrsti po" (8) omogoča izbiro načina razvrščanja (npr. po datumu ustvarjanja, po nazivu, po avtorju itd.) ali brez razvrščanja (privzeto).
- Polje "Sortiranje" (9) omogoča izbiro načina sortiranja (naraščajoče ali padajoče).
- Možnost izbire konfiguracije kot "Privzeta" (5) omogoča, da je izbrana konfiguracija vedno privzeta ob vsakem obisku modula.
- V sekciji Vidno in Skrito (10) so na voljo vsa polja, ki so na voljo za prikaz na hitlisti.
- V polju Vidno so polja, ki so trenutno prikazana na hitlisti.
- V polju Skrito so polja, ki niso prikazana na hitlisti.
- Spremembe so shranjene avtomatsko, ko uporabnik zapre modalno okno s klikom na križec v desnem zgornjem kotu modalnega okna ali s klikom zunaj modalnega okna.
Uporabnik lahko polja premika med poljema Vidno in Skrito tako, da polje prime (povleci in spusti) in prenese levo (ni prikazano na hitlisti/Skrito) ali nazaj desno (je prikazano na hitlisti/Vidno).
Uporabnik lahko nastavi tudi želeno zaporedje (11) prikazovanja stolpcev od leve proti desni na hitlisti, tako da na sekciji Vidno z metodo povleci in spusti premakne posamezno polje in ga umesti na želeno mesto prikaza na hitlisti. Zaporedje na hitlisti od leve proti desni je na seznamu polj od zgoraj navzdol.
The user can move fields between the Visible and Hidden fields by grabbing a field (drag and drop) and moving it left (not shown on the hitlist, or Hidden) or back right (shown on the hitlist, or Visible).
The user can also set the desired order (7) of column display from left to right on the hitlist, by using the drag-and-drop method in the Visible section to move an individual field and place it at the desired display location on the hitlist. The order on the hitlist from left to right corresponds to the list of fields from top to bottom.
The user can set the desired number of documents displayed per page (2), the desired sorting method (3) or none (default), and the sort direction (4).
Using a document list customization
The user can use document list customizations that they have created themselves. A document list customization created by a user is visible only to that user.
The user can quickly access and use active document list customizations by selecting the desired configuration, in the top left corner above the hitlist, next to the saved filters:
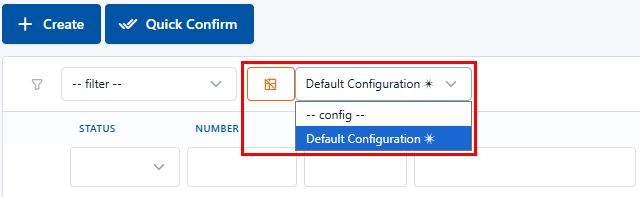
When a document list customization is selected, the hitlist automatically refreshes and shows documents according to the selected customization. The selection can be changed or reverted to the default customization by selecting the button next to the configuration field.
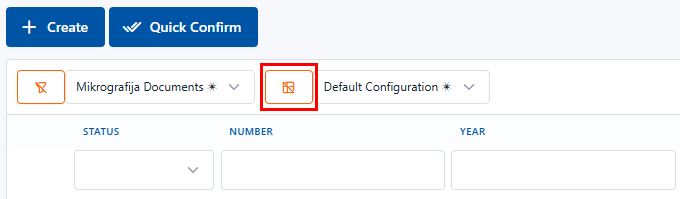
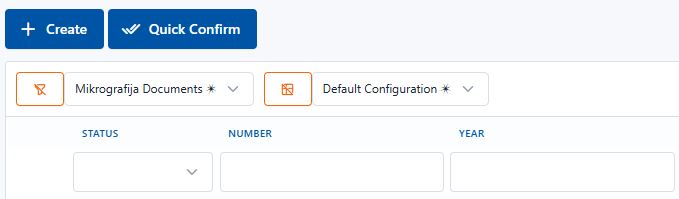
A document list customization can be used on its own or together with saved search filters.
Removing a document list customization
Procedure for removing a document list customization (on the hitlist where the user created the customization):
- Select the "Configuration" icon.
- A configuration modal window opens.
- Click on the Name field (1) and select the customization you want to remove.
- Click the trash icon (2) next to the Name field.
The document list customization is automatically removed. The system automatically selects another available document list customization.
Exporting the document list
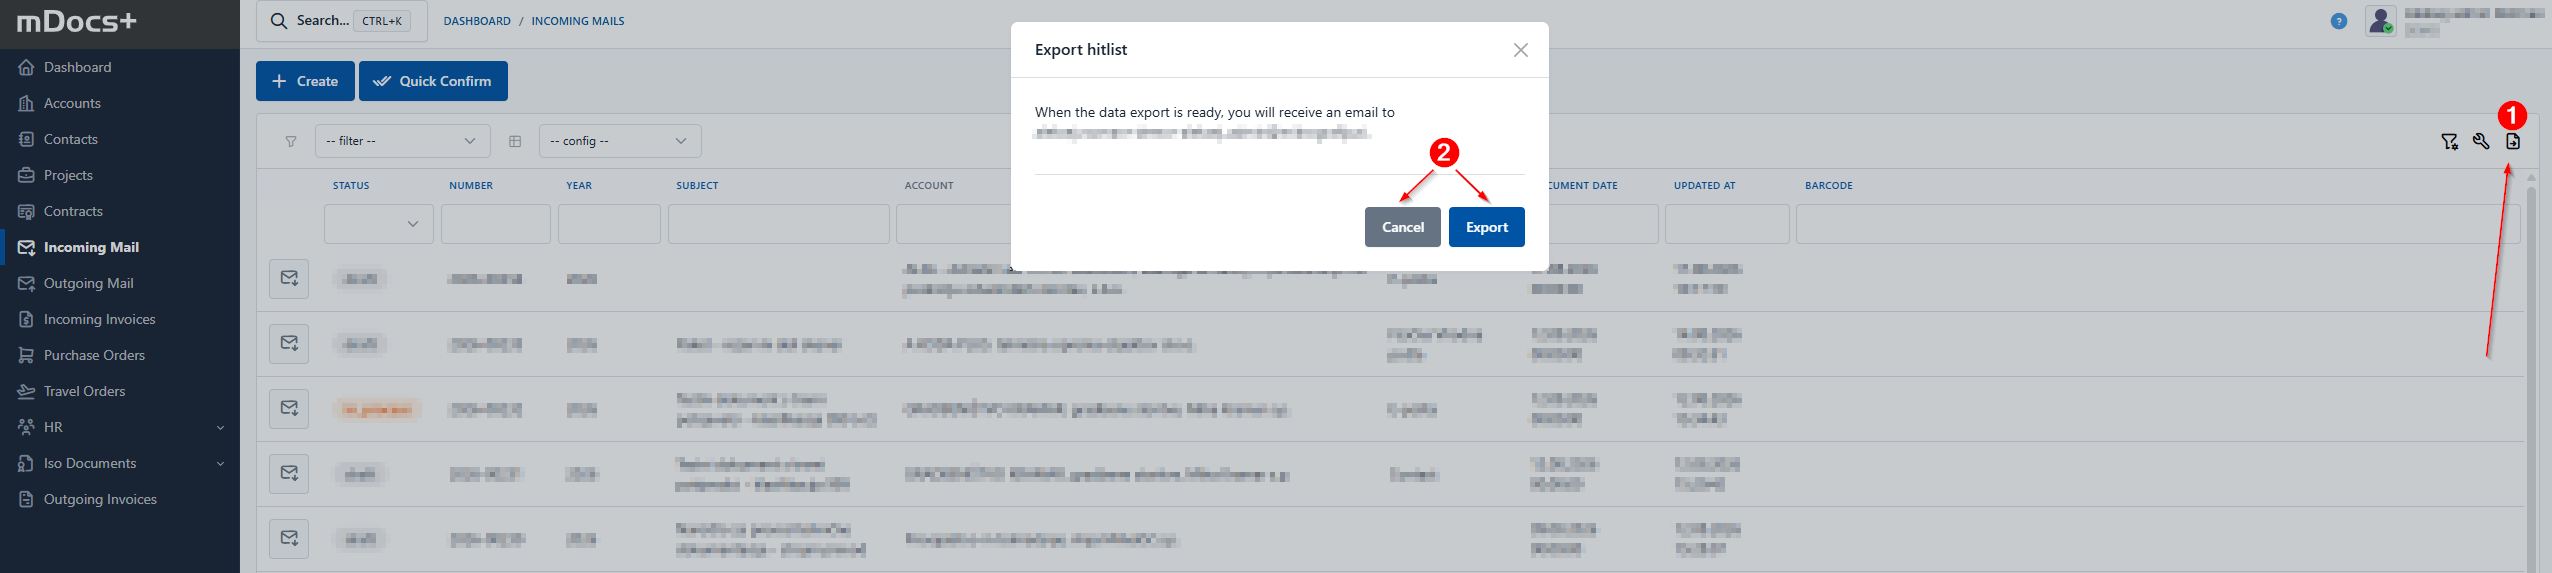
By clicking the Export list icon (1), the user can export the document list or hitlist, either the entire list or the current one according to an established filter or several filters. The message in the pop-up window (2) Export list is confirmed by the user with Export to proceed (the system sends the export to the user's email address), or the export can be cancelled.
Viewing attachments from the document list
The user is on the document list and wants to move (with the mouse or Ctrl+up/down arrow) through the document list while also viewing document attachments:
- click on a record or document in the document list. The record is shown on the right.
- click on the Attachments tab, click on an attachment.
- as you move through the document list, the attachments (the first one in the attachment list, if there are several) are shown on the right. To move between attachments on a single record, the user uses the left and right buttons or the attachment drop-down list in the attachment viewer.
Viewing attachments on a document
By clicking on a document, the document is shown with data, e.g. from the Incoming documents tab. The user views attachments by clicking the Attachments tab. A list of attachments opens. Attachments can be viewed in an internal view within the system; an attachment can also be viewed in an external view. To view it via the external view, the user clicks on "..." next to the attachment and selects "External view".
Bulk approval
The bulk approval feature allows you to approve a large number of tasks at once, speeding up work on routine approvals.
Bulk approval is available for tasks on the dashboard, just as for any other module.
Bulk approval procedure:
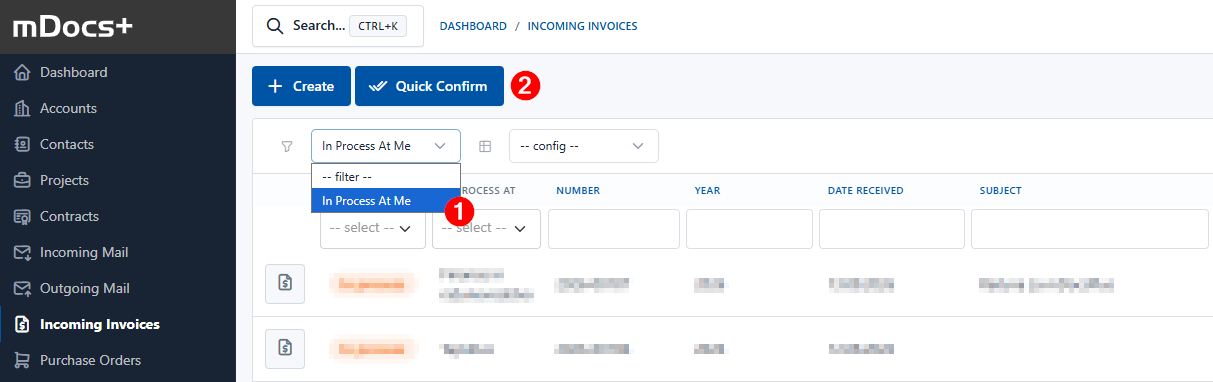
- Filtering tasks: For easier review, you can informatively filter tasks using the "In process by me" filter (see point 1 in the image). This filter captures all tasks that are assigned to you (personally assigned), to your signing code, or to a group of which you are a member.
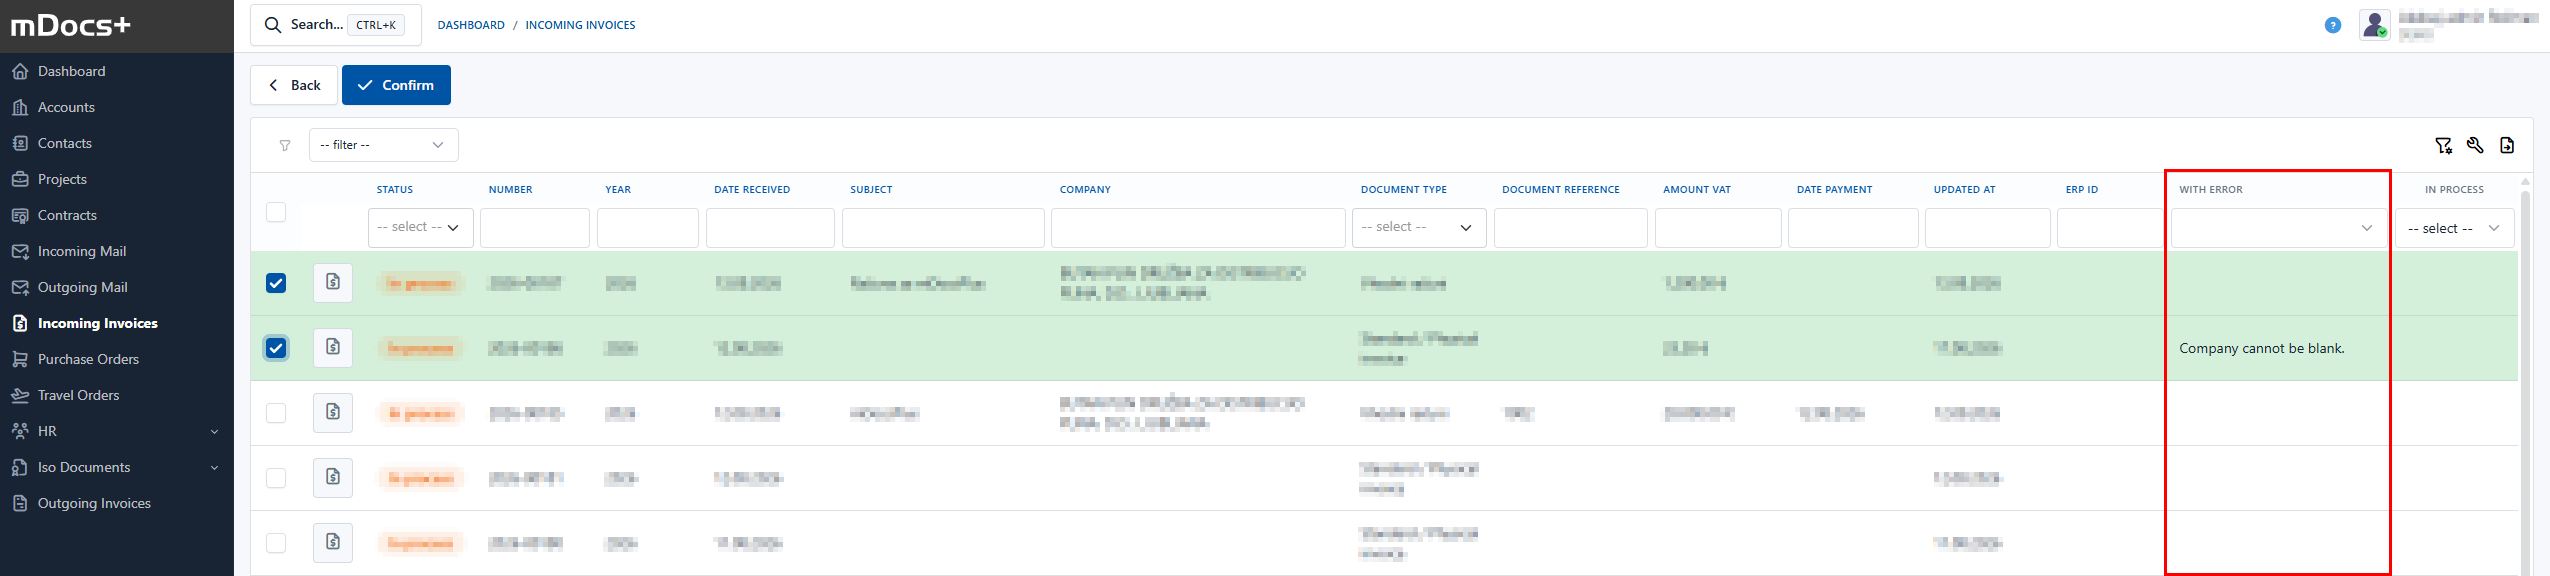
- Entering the bulk approval view: Clicking the "Bulk approval" button (see point 2) opens a new, customized view (see point 3).
- Selection and confirmation: In this new view, simply select the desired records and click the "Confirm" button to carry out the approval for all selected tasks at once.
Resolving possible errors during bulk approval On the additional bulk approval screen (3), pay attention to the last column, Errors. If the confirmation cannot be carried out due to content deficiencies, the reason will be displayed there.
Examples of errors: * "The Contract attribute (DN - Procurement) cannot be empty."
- "Bulk approval is not set up for this step."
Bulk approval is only enabled if it has previously been switched on at the system level.
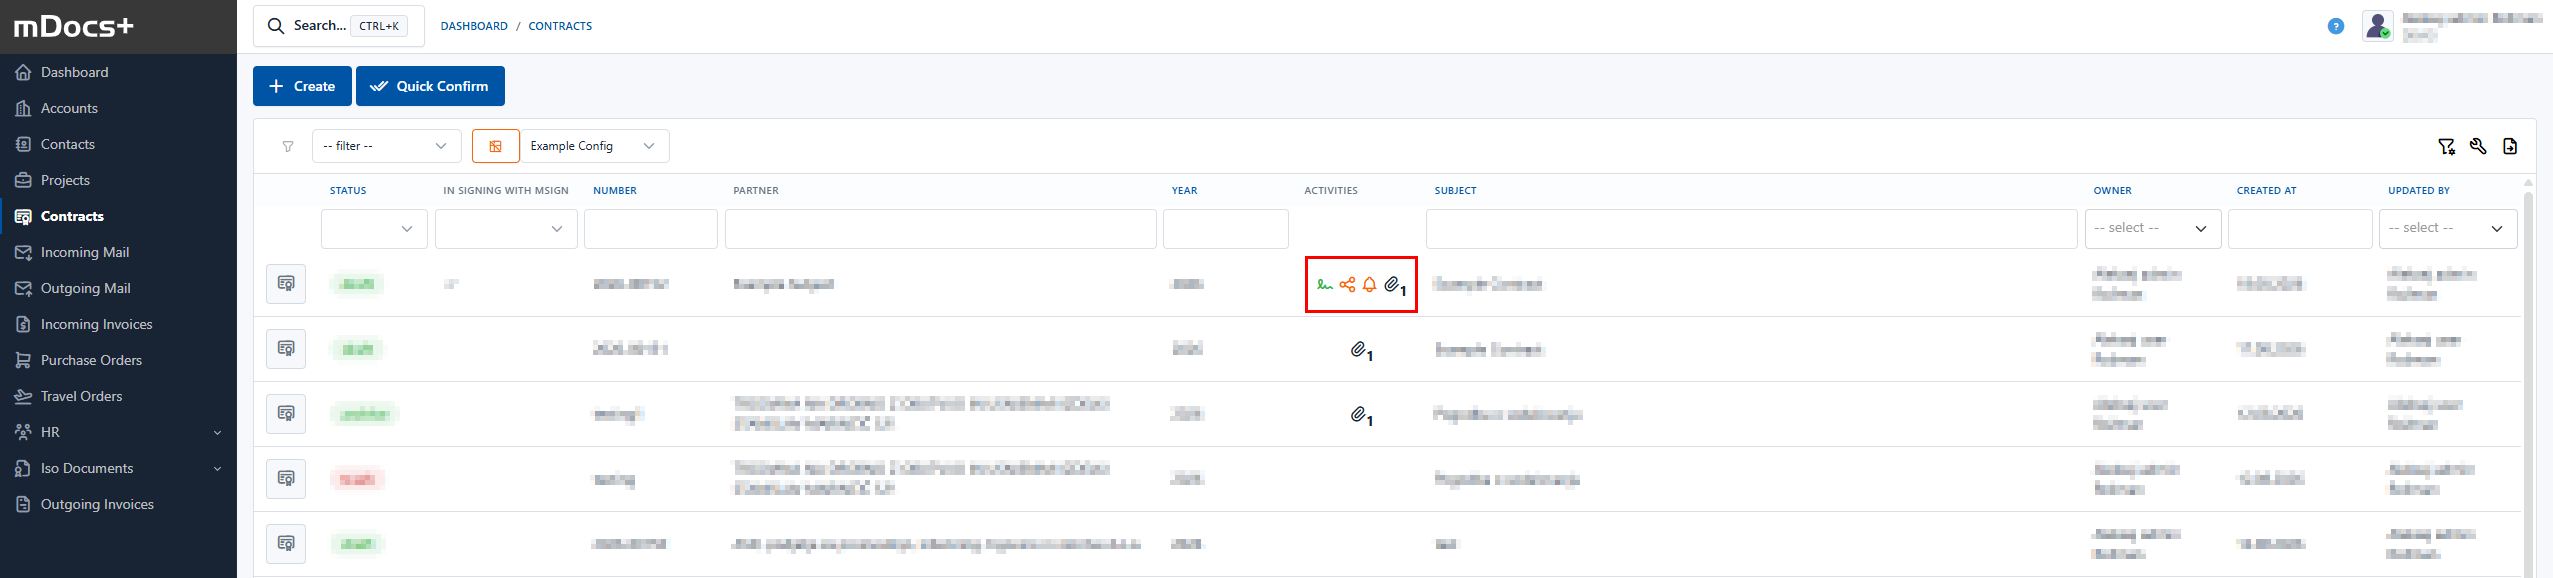
Indicators on the document list
For better clarity, the document list provides special indicators (icons) that show the status of individual document activities in the form of a "traffic light".
If a certain module doesn't have an "Activities" column by default, you can enable it in a custom hitlist config.
The following statuses are available:
-
mSign status (signature icon)
- Gray (or no icon): no e-signature, i.e. no attachment has been signed via mSign.
- Orange: at least one attachment is awaiting signature in mSign.
- Green: at least one attachment has been sent to mSign, all processes are completed and the last process was signed successfully.
- Red: at least one attachment has been sent to mSign, all processes are completed, but the last process was not signed successfully.
-
"Shared document" status (sharing icon)
- Gray (or no icon): the document is not shared.
- Orange: attachment sharing is active.
- Red: sharing with editing enabled is active (if at least one share has editing enabled, the icon color is red).
- Green: sharing is no longer active.
-
Ad-hoc tasks (tasks created via comments) – applies only to the current workflow step
- Gray (or no icon): no active ad-hoc tasks.
- Orange: ad-hoc tasks are currently active on the document.
- Red: at least one ad-hoc task has been rejected or has failed.
- Green: the last (or all) ad-hoc task has been approved.
-
Attachments on the document
- Gray (or no icon): the document has no attachments.
- Black (bold): an attachment is stored on the document (the number of attachments is shown next to the icon).